Your first pick
This page follows one operator through a single wave: planning the work from the order list, walking the route the module determines, scanning every unit, reporting what the shelf did not have, and closing the orders at the packing bench. The remaining picking documentation describes the details of these steps.
Before you start
Section titled “Before you start”Three prerequisites have to be in place; otherwise the wave either cannot be planned or is created empty.
The catalogue has to be linked. Without the setup wizard every line would be reported as “not in stock”, and the module does not allow a wave to be planned at all. → Initial setup
The goods have to have locations. Stock held in the unassigned pool can be picked, but there is no shelf an operator can be sent to. Bin locations come from the floor plan or from the bin generator. → Bin locations
The order states have to be configured. Packing requires a Complete and an Incomplete state; if either of them is missing, it does not process orders and reports the reason. → Packing settings
For picking to a cart, the warehouse also requires at least one element of type Picking cart on the Elements tab. Without it, orders travel unsorted and the sorting is carried out at the bench.
1. Plan the wave
Section titled “1. Plan the wave”Go to Orders → Orders in the Shopware admin. There are two ways to start:
- Quick pick — plan a wave leaves the selection to the module: it takes the orders that can be collected at this moment in this warehouse.
- Create packing operation on orders selected manually builds the wave from exactly those orders. With several warehouses the Choose target warehouse dialogue asks which warehouse the work belongs to.
Planning reports what it did not include: orders held by another wave, orders with no cover in this warehouse, orders belonging to another building, oversized orders, and the orders that did not fit on the cart. Read that list: it explains why a given order is not part of the wave.
If the selection contains orders with no cover, the module asks how to handle them — Pick what is available, Pick everything anyway, or Put aside and stop asking. For a first run, select what is available.
2. Read the list before walking
Section titled “2. Read the list before walking”The planned wave opens the picking screen. Pick list groups the lines by floor (Floor) or alphabetically (A-Z), and each line carries its location, quantity and status.
Read the summary above the list first. Lines marked not in stock, another warehouse or shelf life too short are not work to be carried out. They are decisions that have to be taken, and picking cannot complete them.
Each line also states why that particular lot was selected: selected by the rule, with the rule name, or the system default, which is the soonest expiry first.
3. Walk the route and scan
Section titled “3. Walk the route and scan”At the shelf, scan the code or enter it manually. The line is found, one unit is confirmed, and the module reports when something does not match: the code matches no line, the line is already complete, or the product is marked as out of stock. With voice guidance enabled the same information is read out, so the operator does not have to look at the screen. → Voice picking · Picking in practice
A completed line displays its full count and is no longer requested.
Goods are placed on the picking cart, in the slot the wave assigned to that order — half a shelf, a whole shelf or several, depending on the size of the order. The cart front view on the picking screen shows which order is stored where, so the goods reach the bench already sorted.
4. Report what the shelf did not have
Section titled “4. Report what the shelf did not have”One rule is important from the first wave onwards: do not collect less without reporting it. Use Report a shortage, enter how many units were actually present, and select a reason — Shelf empty, Fewer than expected, Damaged, Different product on the shelf, Cannot be reached, Count differs from the record.
The report has consequences: the missing units may be re-earmarked to another shelf, and a difference beyond the tolerance sends that location to be counted instead of correcting the figure without verification. → Reported shortages
Three additional actions cover the remaining situations at the shelf: Book found stock when the goods are present but the wave did not include them, Count this bin to count the location on the spot, and Assign a bin when the stock had no location and the operator is standing at the shelf it belongs to.
5. Hand over to packing
Section titled “5. Hand over to packing”With progress saved server-side, the header displays the synchronisation state: all scans saved, saving in progress, or the number of scans that were not transmitted. A wave cannot be finished until every scan has reached the server. This is intentional, and the scans are re-sent automatically.
Next: Pack then opens the packing screen.
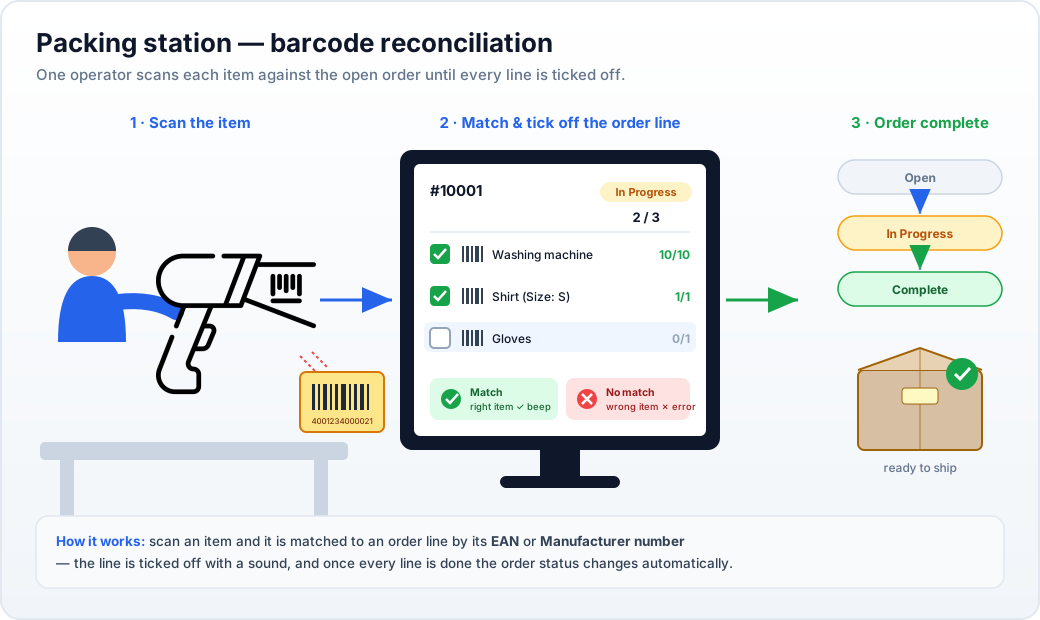
6. Pack and close the orders
Section titled “6. Pack and close the orders”Packing has two views: Batch Picking, showing all the lines of the wave together, and Order Picking, order by order. The scanner works in the second view only.
What the operator marks depends on the setting. With Select packed products the operator marks what was placed in the parcel, and the order is complete only when everything is marked. With Select products that are out of stock only what could not be packed is marked, and the remainder counts as done. For a first wave, marking what was packed is the safer of the two options.
Next moves the orders into the configured Complete and Incomplete states. Depending on the confirmation mode, the changes are applied immediately or wait for confirmation, and a Packing summary reports how many orders changed state and which ones failed, with the choice between Complete operation and Leave in progress.
The packing bar prints the Pick List, the Packing Slips and the Current Packing Slip for the order currently displayed. → Packing and the assistant
Checking it works
Section titled “Checking it works”One wave exercises the whole chain: reserved stock leaves its bins, every unit is confirmed by a scan, what was missing on the shelf is recorded, and the orders end in a state the shop can act on. Every quantity that was moved appears in the movement history with its reason and the operator who carried it out. → Movement history
Where to go next
Section titled “Where to go next”- Picking waves — planning, what it skips, and one wave at a time.
- Picking in practice — the picking screen in depth.
- Reported shortages — what happens to a shortage after it is reported.
- Packing and the assistant — marking modes, order states, pick-to-cart.
- A day of work — where picking sits among the other jobs.